Installing Salvaged Floors into Existing Floors
At the area at the top of the stairway is a large landing. I joke and call this my cafe as I plan to put a big sofa up here and place a projector to show movies on the large wall of the turret which has no windows. It should make a great little home theater of sorts. This area had been a built out tiny bedroom which had the turret windows blocked off in a closet. It was a very odd arrangement. Once it was opened up one really got a feel of the space and size. Here are some before photos;
All gone including the pink carpet.
Showing the fixed and double hung window gutted. Yes this was taken in winter and yes those holes did make the house cold for those first few years.
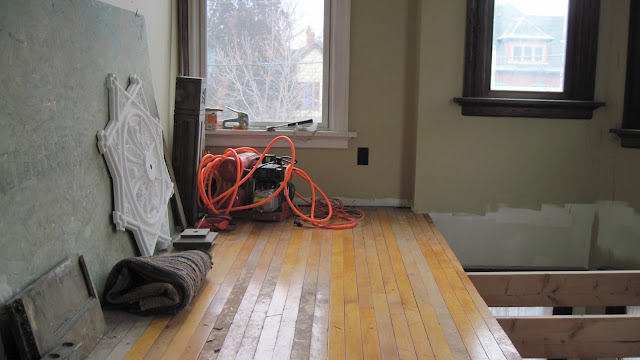
Sadly most of the floors in this area were missing and damaged from an old water leak on a radiator. I saved what I could and pulled out the rest. I went to a wonderful salvage yard in Minneapolis and picked up around 200 square feet of birch hardwood flooring. It took me a good 4 hours to pull all the nails out and get the boards ready to be placed. The toughest part of putting old floors in with new floors is getting the two different pieces to fit tight. In this instance it required me to cut the bottom lip off the groove and put the top lip a little bit more shallow. After doing this on the table saw and a couple of tries I got it to fit, nailed it in and progressed on the rest of the field. Here are the photos:
I needed shims so I used some extra cut shingles my dad had cut for the exterior. So if anyone pulls up these floors I'm sure they will wonder where these fancy shims came from.
If you like what you read and want to see this blog and projects keep going PLEASE feel free to donate something, even if it's only a little bit. Every little bit helps on this restoration project. Thanks again!
Behind the door is where the square fixed window is. Inside the closet where the drywall is cut out is where the large double hung window was hidden.
All gone including the pink carpet.
Showing the fixed and double hung window gutted. Yes this was taken in winter and yes those holes did make the house cold for those first few years.
Sadly most of the floors in this area were missing and damaged from an old water leak on a radiator. I saved what I could and pulled out the rest. I went to a wonderful salvage yard in Minneapolis and picked up around 200 square feet of birch hardwood flooring. It took me a good 4 hours to pull all the nails out and get the boards ready to be placed. The toughest part of putting old floors in with new floors is getting the two different pieces to fit tight. In this instance it required me to cut the bottom lip off the groove and put the top lip a little bit more shallow. After doing this on the table saw and a couple of tries I got it to fit, nailed it in and progressed on the rest of the field. Here are the photos:
I needed shims so I used some extra cut shingles my dad had cut for the exterior. So if anyone pulls up these floors I'm sure they will wonder where these fancy shims came from.
Once sanded and stained it will all look as if it's always been here. Now I can put back the railing and the spindles on the right side of the photo. I have to get a few spindles made since many were missing and broken. The cafe is getting along!! Although I will admit that I am SORE, SORE SORE! All this bending, walking up and down the stairs and putting it in was hell on the body but good to have this project complete.
One more thought to share. When I woke up to start the stairs we had a very thick icy fog covering the land outside. There was no snow on the ground but you know right after a snow fall when all the trees and bushes are so beautiful they look as if they are painted. Well that happened last night and was absolutely beautiful!
If you like what you read and want to see this blog and projects keep going PLEASE feel free to donate something, even if it's only a little bit. Every little bit helps on this restoration project. Thanks again!


Comments
Post a Comment